Shopify: How to Install Consent Studio
Use the Installation wizard to add Consent Studio to your Shopify store, then required: turn on Shopify Customer Privacy API, and give Monitoring access
Last updated About 2 hours ago
Install Consent Studio on your Shopify store with the Installation wizard
Consent Studio does not have a Shopify app. To add the consent banner to your store, you add a small piece of code to your Shopify theme. You do not need to write that code yourself. The Installation wizard in Consent Studio asks you a few questions about your store and builds the right code for you.
This article shows you where to find the wizard, what to expect at each step, and two extra steps the wizard does not cover: a required Shopify Customer Privacy API toggle, and Monitoring access.
Make sure that you have registered the domain you are planning to implement Consent Studio on in the Consent Studio Dashboard.
Step 1: Open the Installation wizard
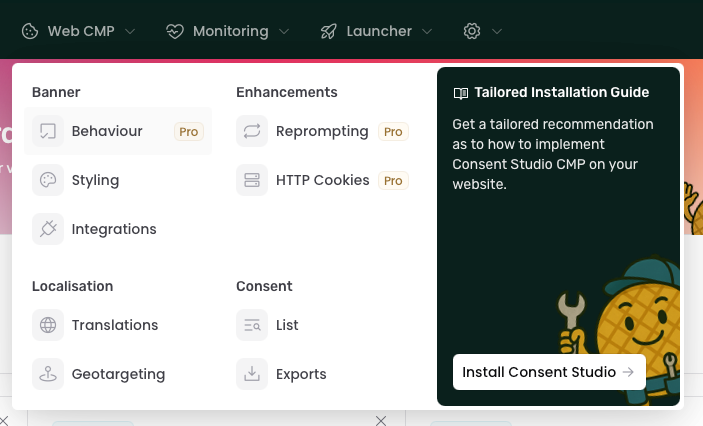
In the dark navigation bar at the top of the app, click Web CMP (the cookie icon with a small down arrow). A dropdown menu opens.
On the left you see the menu sections Banner, Enhancements, Localisation and Consent. On the right is a highlighted panel titled Tailored Installation Guide.
In that panel, click the Install Consent Studio button.
The page that opens has the title Install the consent banner on [your domain]. Under the top bar, a smaller bar reads Implementation › Installation. The wizard has three steps: Introduction, Questions and Recommendation.
Step 2: Answer the questions
What do you want to install? You only see this question if your account has Launcher. Choose Consent Banner (Web CMP).
What platform is your website built on? Choose Shopify.
Are you comfortable editing your website's code, and do you have access to do so?
Yes: the wizard continues with the next question.
No: the wizard shows We recommend bringing in a colleague, with the buttons Invite a new collaborator and Get Support. Because there is no Consent Studio app for Shopify, someone needs to edit your theme. Your colleague can click Retake the questionnaire to get their own recommendation.
Are you using Google Analytics and/or the Google Conversion Linker on your website? Most stores answer Yes. The wizard marks this answer as Most Likely.
Shopify stores do not get a question about Google Tag Manager.
Step 3: Follow the recommendation
For Shopify, the Recommendation step shows Recommendation: Use Custom Code. The main block is titled Installation Code.
Installation Code
Add the snippet to the <head> section of your Shopify theme (typically theme.liquid). Put it before other scripts when you can. To open the theme file, go to Shopify Admin → Online Store → Themes → Edit code.
The Installation Code block lists these features:
Google Consent Mode v2
Hardened against ad blockers
Direct installation
You also see the notice Placement is important: the Consent Studio snippet must load before GTM or other Google scripts (Google Tag, Conversion Linker).
Code Snippet
Under Code Snippet you see the script to add. Use Expand to view the full code and Copy code to copy it. Optional Modify Script toggles let you adjust the snippet, for example for debug logging or example Google Tag Manager / Google Tag code.
Required: Checkout Reinforcement
Shopify checkout runs separately from the rest of your store, so checkout cannot see the choice the visitor made in the consent banner. You must also add the Checkout Reinforcement custom pixel. This is a required step for every Shopify install, not optional.
Required: do not skip Checkout Reinforcement. Without this custom pixel, your checkout does not receive the visitor's consent. Merchants must complete both the theme <head> snippet and the Checkout Reinforcement pixel.
In the wizard Recommendation, find the Checkout Reinforcement section and copy that second code block.
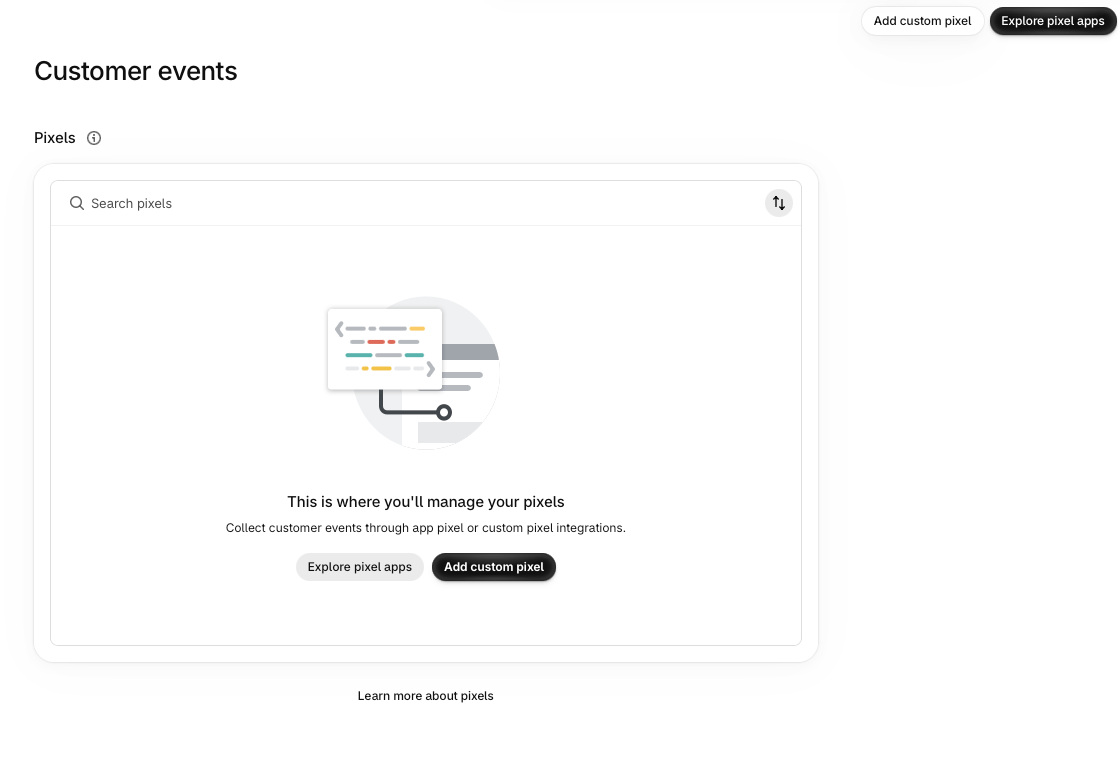
In Shopify Admin, go to Settings → Customer events → Add custom pixel.
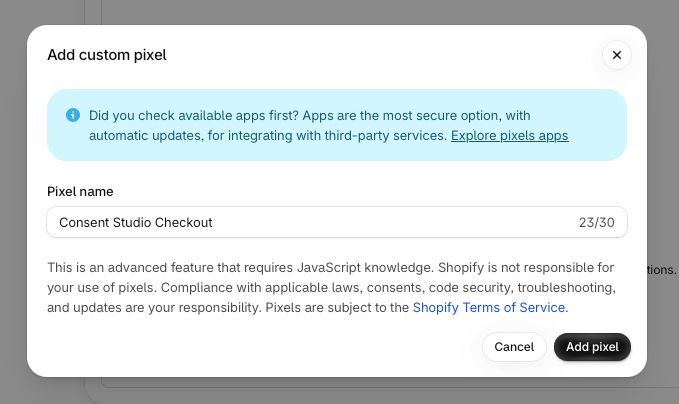
Give the custom pixel a descriptive name and click Add pixel.
Paste the Checkout Reinforcement code.
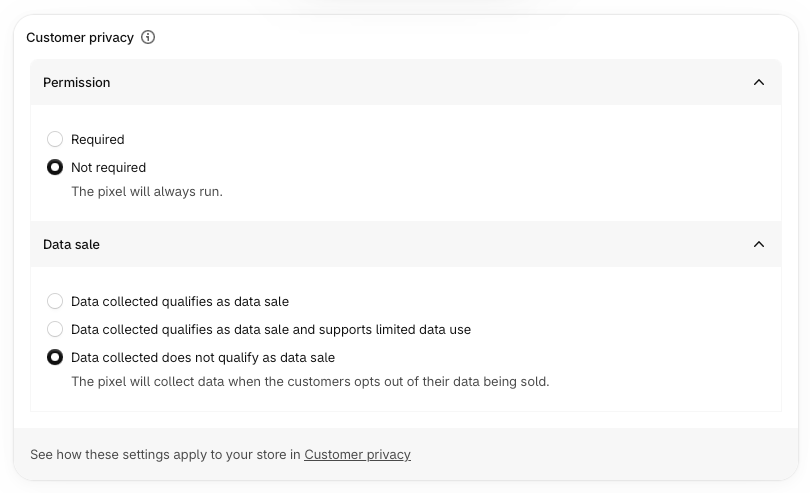
The Checkout Reinforcement Pixel must not have any requirements applied for Customer privacy. The value of Permission should be Not required (“The pixel will always run.”) and the value of Data sale should be Data collected does not qualify as data sale.
Click Save
Connect (top right corner) the pixel finally
Next steps
The wizard ends with next steps: blocking embeds and scripts, and publishing the cookie declaration.
Step 4: Required: Turn on the Shopify Customer Privacy API
This step is not part of the wizard, but it is required for every Shopify install. Without it, Shopify and the apps in your store do not respect the visitor's consent choice. In Consent Studio you turn this on with a toggle: no code changes. That no-code activation is unique to Consent Studio.
Required: enable Shopify Customer Privacy API. Go to Web CMP → Banner → Integrations and turn on Shopify Customer Privacy API. More detail: Shopify Customer Privacy API x Consent Studio CMP.
In the top bar, click Web CMP.
Under Banner, click Integrations.
Turn on Shopify Customer Privacy API.
For the full steps, read Shopify Customer Privacy API x Consent Studio CMP.
Step 5: Give Monitoring access to your store
This step is also not part of the wizard. You need it so that Monitoring can scan your store for tracking technologies.
Shopify blocks automated visitors and does not let store owners allowlist IP addresses. Instead, you create a crawler access signature in Shopify and add it to Consent Studio. Monitoring then uses that signature to visit your store.
In Shopify Admin, go to Online Store → Preferences → Crawler access and create a signature.
In Consent Studio, click the gear icon at the far right of the top bar tabs. It has no text label.
Under Domain, click Domain Settings.
Open the Access tab and paste the signature there.
A signature lasts up to three months. We send you a reminder before it expires. When a signature expires, scanning stops until you replace it with a new one.
For the full steps, including what to fill in and how to test access, read Let Consent Studio Monitoring into your Shopify store.
Where to find reminders
If something is missing or about to expire, Consent Studio tells you. In the top bar, click Monitoring, then under Analyse click Recommendations. For example, if the Shopify integration is not turned on, you see Enable Shopify Customer Privacy API integration. A crawler access signature that is about to expire also shows up here.
Related articles
Still need help? Ask the team